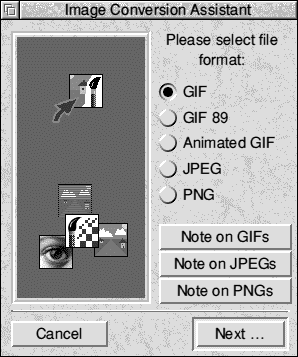

The first window that appears is the Format Selection window. This is where you must make the main conversion choice - what format should I convert into? If the page is destined for the World Wide Web, then leaving the image in Sprite format should not be considered an option.
The first decision to make is whether you should use JPEG or GIF files. There are two criteria on which the decision should be based:
If the answer to the first question is Yes, then you must use JPEG as it is the only common 24bpp graphics format used on the WWW.
If the answer to the former question was 'No', then the chances are that you'd be better off using one of the GIF file formats, if only because you will be given the option of 'interlacing' later. This is the effect where the detail of the image gradually builds up, so that you quickly get an overview of the subject, and you only need wait for it to completely download if it is of interest.
If the answer to the second question was 'Yes' then you must choose the GIF89 format which allows a level of transparency. Remember that the 256 colour limit still applies.
* The version of Image Conv that comes with the basic HTMLEdit (ie. not Studio version) is as described. However, the version in Web Designer's Toolkit is later and has a number of enhancements, notably the support of 32bpp PNG images, and also to generate "best fit" GIF palettes for 24bpp images. The utility is described again in the next section, with fuller illustration.
The only decision which needs to be made with standard GIF files is whether to interlace them or not.
As mentioned above, interlacing is probably preferable, as it allows your viewers to gain a quick overview of the content of the illustration, without any overall speed penalty if they wait for the whole image to download.
The only disadvantage with interlacing is that if you're trying to get a particular graphical effect on your page, the interlaced build up may detract the eye whilst it is in progress.
The GIF 89 format is the only common WWW format to support a transparent mask for your images.
By default, the ICA will use the transparent mask which can be applied to any sprite with !Paint which came with your computer. This is controlled by the From Mask radio icon.
In some circumstances you may wish to mark a fixed colour in your sprite as being transparent. For example, in a sprite with a white background, you might wish to specify white as the transparent colour. In these cases, you should read the colour number from !Paint's colour picker window. Simply click on the colour in the sprite's palette window in !Paint, and the selected colour will have a number overlaid upon it. This is the colour number which should be typed into the box below Fixed Colour. Remember to click on the Fixed Colour radio icon to tell the ICA to use the colour.
As with standard GIF files (see previous page), you can interlace GIF 89 images.
By selecting a JPEG image, you give up the interlace and transparency options available to GIF files, but you gain support for full colour, 24bpp (16.7 million colour) graphics. Choosing the JPEG option will open the JPEG Conversion window. The effect of ticking the Monochrome option should be fairly obvious - your image will be converted into black and white (or greyscale). On the other hand, the Quality option is unique to JPEGs, and controls the compression of the data. The lower the quality, the lower the disc space requirement, and the quicker the image will download. The default represents a reasonable trade off (barely noticeable, in fact) between image degradation and file size
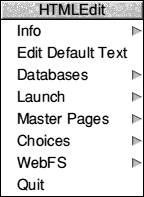
The Edit Default Text option requires a little more explanation:
This allows you to modify the text that will be inserted as the default body text when you choose to insert it in the Document Creation Assistant windows. This is very useful for setting up a global template or house style, and it can be used with both HTML 2 and HTML 3 pages, provided you are not using another Master Page.
The Open Toolbox option is provided for occasions when you have either closed the main toolbox, or for some reason it is not visible. Note that you must have at least one open document for this option to work.

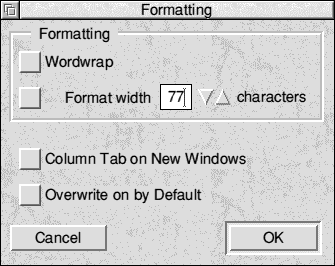
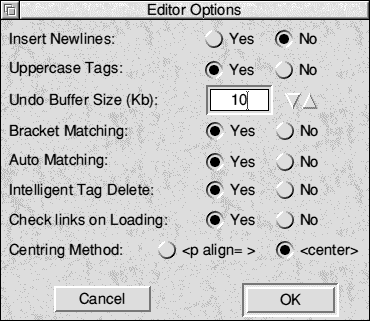
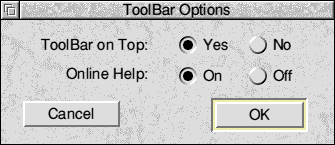
The choices are in eight areas. The
Editor options determine options
directly to do with text editing eg. upper
or lower case tags, bracket matching or
intelligent tag handling. The Toolbar
choices control the display of the
toolbar, whilst the Display window
controls how the text actually looks in
the editing window (eg. fonts etc.).
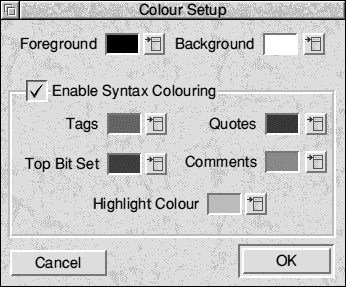
Coulours enable variable Syntax
colouring for Tags, Quotes etc.
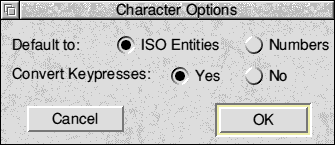
Note that right-clicking on a character in the Chars window will use the opposite convention.
For overseas users, or those using foreign characters regularly, there is an auto-expansion option which will convert 'on the fly' as you type into HTMLEdit. This saves you having to select every character from the Chars window. You can toggle this option via the main HTMLEdit window menu, or by pressing Ctrl-Shift-K.
As we release more HTML tools and utilities, it becomes obvious that a 'control centre' is required to access all the different tools available. To fill this need we have added a Launch sub- menu on the HTMLEdit iconbar menu. You can add both applications and directories (eg. your web sites) to this menu very easily and quickly access them at a later date.
To add a program to the menu, simply click on the New... option and drag the program you wish to add to the window which appears. You can give the menu entry a more sensible name, if you wish, which can include spaces. There is also an option to open the dragged file as a directory, which will automatically be ticked if you drag a WebFS folder or RiscOS directory.
Once you have set all this up, click on OK, and a new entry will appear on the Launch menu. Simply click on it to, well, Launch it! Should you wish to remove an entry, select from the Remove sub-menu.
HTMLEdit's Master Page feature provides a powerful way of standardising on house styles and layouts. Before creating your new Master Page (MP), you should create the page exactly as you wish it to appear using HTMLEdit to produce a WWW page as normal. You can include images (both inline and as backgrounds) as well as text.
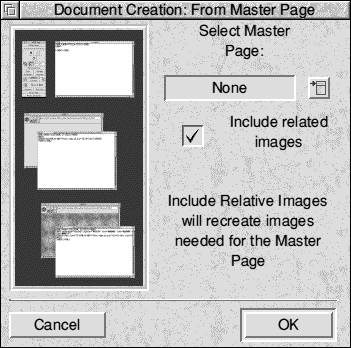
The Master Page menu can be found from the HTMLEdit iconbar menu. Once you have saved your template page, click on the New... option on the Master Pages menu, to open the window shown right.
If the Scan for Related Images icon is ticked, HTMLEdit will read your page, and automatically identify, locate and include in the MP any images that the page refers to. These images will then be recreated when the MP is used.
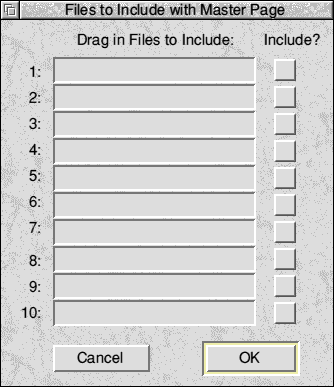
If you wish to include images or files which HTMLEdit has failed to detect (eg. links), you can drag them in now.
Click on OK to create your new MP.
If you are unhappy with a Master Page, bring up the Master Page menu from the HTMLEdit iconbar menu, and provided at least one MP exists (!) there will be a Remove option leading to a further menu. This simply lists all the available MPs and clicking on one will remove it. You will be asked to confirm the removal, just in case you made a mistake!
Once the MP has been removed, HTMLEdit will automatically rebuild all menus associated with Master Pages, so your changes will take instant effect.
There are two ways to use your Master Page once you've created it. Both methods achieve the same results, so try each and see which suits your way of working:
Once you have created your new document, it behaves just like any other HTML document in HTMLEdit, it has simply saved you having to retype all the HTML you use every time!
Potentially one of the most useful features of HTMLEdit is its ability to produce pages made up of dynamic building blocks. Common sections of your pages can be stored separately, allowing you to quickly make global changes to your site, and all you need do is click on the Publish option in HTMLEdit to rebuild.
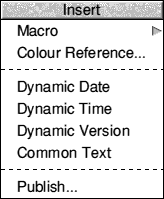
Clicking on any of these dynamic content types, inserts an HTML comment into your page (which will not be displayed by a browser) with specific instructions to HTMLEdit.
Once you have created your page, and are ready to publish, click on the final option on this menu - Publish. You will be prompted to save you published page in the normal way, and HTMLEdit will then do the rest. If you have used the version number feature, you will be prompted for a new release number, which can be anything you wish.
To successfully use the dynamic content features, we recommend storing your WWW site in two separate directories. In the first, you should store all your source documents (including the HTML pages themselves and images), and you should treat the other directory as an 'online ready' version. Pages can then be published from the source directory to the other, and provided you keep a similar directory structure in each, you won't have any problems with linking and images.
The !Publish utility supplied on your HTMLEdit disc extends this functionality to allow you to publish a whole directory of files at once. In addition, if you have any sprite files etc. (files in a non-Web friendly format) left over, you can tell !Publish to ignore them. This functionality is much extended via the SiteMaster product, also available from R-Comp.
HTMLEdit stores three distinct user databases - Macros, URL's and Links, and the Image Database. Editing of each is done via the Databases option on the HTMLEdit iconbar menu, and each database then plugs into relevant windows and menus within the main work environment.
The macro database is available via the main HTMLEdit document menu, under the Insert sub-section. You simply pick the macro you want from the menu of all those that you have created.
To edit the macro database, use the Databases sub-menu from the icon bar menu. Clicking on the Macros option brings up the main control window.
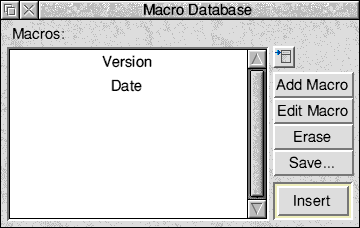
Clicking on the Add Macro button
opens a window allowing you to create
a macro. Each macro consists of a
name and the macro itself. Leaving
either field blank results in the filled-in
field being used for both. Many macros
will just consist of commonly used text
sequences, but there may be times
when you need to include specific
information at the time of execution.
For these situations, the macro system
uses %%x notation. There follows a list
of commands available:
%%P = Request a parameter from the
user for inclusion at that point in the macro.
%%D = Insert current (at time of
execution) date at that point in
the macro.
%%N = Insert a newline (return) at
that point in the macro.
It is possible that additional commands may have been added since this document was published - check any Readme files on your HTMLEdit program disc.
If you wish to alter a macro at a later date, simply select the macro in the list, then click on the Edit Macro button. A window similar to the Add Macro window will appear, but with the macro details already filled in for you to edit.
To delete a macro, simply select it, then click on the Erase button. The macro will be erased from memory, but will still be stored on disc (ie. re-loading will undo the deletion).
To make any changes permanent, click on the Save button.
This database is used from the Anchor window (brought up by clicking on the blue link icon on the left hand side of the toolbar) via a menu icon. It provides you with an easy way of storing commonly used named links and external URLs. You can give the URLs sensible names for identification purposes, too.
To set up the URL and link database, use the Databases iconbar menu sub- menu. The main behaviour of the window is identical to that of the macro database described previously, the only differences being that %%x commands aren't supported in URLs and links, and that the results are accessible via the Anchor window.
One of the most useful features of HTMLEdit for organising your work is the Image Database. This allows you to store commonly used images and graphics files within HTMLEdit for instant recall at any time via simple menus. As with the other databases, images can be given sensible names describing them for the future. What is unique to the image database is that images can be categorised into groups, with images appearing as a sub-menu of the categories list. The full list is available from the Image Setup window.
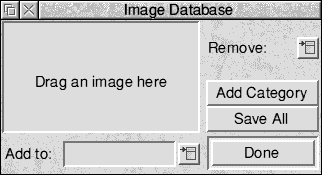
To set up the database, click on Images from the Databases iconbar sub-menu - this brings up the compact setup window.
Before you add images, you must select which category you wish to add to. Do this by selecting a category from the pop- up menu to the right of the Add to field. If you wish to add a new category, click on the Add Category icon on the right of the window. You will be prompted for a category name, and the category will then be created.
To add the image, drag it to the window, then give it a sensible name when prompted. Simple! Note that due to the nature of the action, the database is saved when you add an image.
To remove an image or category, use the Remove menu, and click on whatever you wish to remove. Note that unless you choose to delete images, this option isn't permanent (allowing you to disable some images for a particular session). However, clicking on save will make it so, but we recommend erasing the images via the menu to avoid disc wastage.
To use images once you've added them to the database, either access backgrounds from the HTML 3 Document Creation Assistant window, or use the menu icon in the Image Setup window for a full list. When you select an image from the list, you will be prompted to drag the image to wherever you wish it to be stored in your WWW site, and the software will extract the image to that location and fill in fields as appropriate. Note that if you stored the image as an Acorn Sprite file, you will be given the option to convert it into a more WWW friendly format.
WebFS is a RiscOS filing system which allows for files with much longer names, and doesn't impose any restrictions on the amount of files contained within each directory.
Due to the way WebFS works, a system crash can result in corruption, and whilst it is possible to repair many problems, it is important to retain a backup. On RISC OS 4 and higher, long filenames are supported by the operating system, so regular directories should be used in preference to WebFS. WebFS is not supported on 32bit Iyonix/A9 systems.
A WebFS folder can be thought of as a cross between a normal directory and an archive. That's to say that as far as RiscOS is concerned a WebFS folder is a normal directory, but in fact the files are stored uncompressed within a single 'image' file. Because the files are stored uncompressed, should a WebFS folder become damaged, any undamaged files can be extracted easily. We still recommend backing up important data though! Note that WebFS is no more prone to data loss than a normal ADFS hard disc.
This makes WebFS suitable for building WWW sites where the standard RiscOS file limitations can be very restricting. As an example, if your WWW site will end up on a UNIX machine (very common), then each HTML file will need an extension of .html (/html under RiscOS). The usual RiscOS limit is 10 characters per filename, leaving just 5 characters for your page name! By storing your site within a WebFS folder, your file could have a much longer name eg. HomePage1/html
To create a new WebFS folder, either use the supplied WebFSctrl utility, or use the WebFS menu from HTMLEdit's iconbar menu. From here, you can save out a WebFS folder as you would any other file. You can also open a 'recovery window' onto which you can drop any damaged folders. Once you've created a WebFS folder, you can treat it as any other folder. To create a sub- directory within it, use the standard 'New Directory' options from the filer - don't create WebFS folders within WebFS folders!
HTMLEdit links directly into several components of R-Comp's Web Designer's Toolkit utility suite. Each component of the suite is a separate application, and many can now be thought of as 'plug-ins' for HTMLEdit. Whilst this isn't exactly true, HTMLEdit is now WDT-aware and will talk to these utilities as and when required. This greatly extends the functionality of the software, and allows you to use the program as a complete WWW page control centre - WDT utilities will be launched as required.
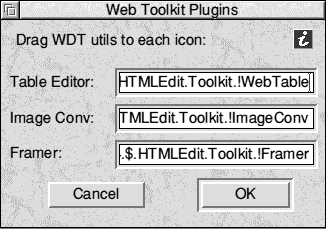
By default, HTMLEdit will attempt to autodetect the presence of WDT components as required, but this means that the tools must have been 'seen' by your computer, and that they haven't been modified by the user. You will also need the latest versions of the tools, as older versions were released prior to this support in HTMLEdit. Should the auto-detection not be practical, you can use the WDT option on the Choices menu (off the iconbar menu) to configure the location of the tools. Once you've done this, HTMLEdit will always know where to find your WDT tools.
Some examples of the way the tools link can be found in WebTable and WebMapper, and others will follow. The table button on the main toolbar hooks directly into WebTable to provide a visual table editing system. Clicking on the table button will load WebTable if necessary and then open up a table creation window. Once you've finished your table, simply close the table window, and WebTable will give you the option to save your table directly back into HTMLEdit.
WebMapper (or WebMapper Lite supplied with HTMLEdit) can be activated by the Preview/Edit Map button in the Image Setup window within HTMLEdit. You should have WebMapper loaded first, as WebMapper is treated as an image previewer (and others may take priority otherwise!) to prevent cluttering up the window with too many buttons. Anyway, once you click on the Edit Map button, WebMapper will display the image and allow you to create a map for it. Once you've finished, you can either save a server-side map to disc, or a client side map back into your HTMLEdit document, and fill out the rest of the image window to suit.